How to Prevent Ice Dams on Your GTA Roof This Winter
Every winter in the Greater Toronto Area, ridges of ice build up along the edges of roofs, and behind that ice, water quietly forces its way under shingles and into homes. The result is stained ceilings, soaked insulation, peeling paint, and sometimes serious structural and mould problems. The frustrating part is that ice dams are largely preventable. If you understand why they form, you can stop them before they ever damage your home.
This guide explains how to prevent ice dams on your GTA roof, the warning signs to watch for, and exactly what to do if one has already formed.
What Is an Ice Dam?
An ice dam is a ridge of ice that forms at the edge of a roof, usually along the eaves and over gutters, and prevents melting snow from draining off. Water pools behind the dam, and because it has nowhere to go, it backs up under the shingles and leaks into the attic, walls, and ceilings below.
Why Ice Dams Form (It Starts in Your Attic)
Here is the key insight most homeowners miss: ice dams are not really a roof problem, they are an attic problem. They form because of uneven temperatures across your roof surface.
- Warm air escapes from your heated living space into the attic.
- That warm air heats the underside of the roof, and the snow on the upper roof melts.
- The meltwater runs down toward the eaves, which hang over open air and stay cold.
- At the cold eaves, the water refreezes into a growing ridge of ice, the dam.
- More meltwater pools behind the dam and is pushed under the shingles, where it leaks inside.
So the three root causes are all about keeping heat out of the attic and the attic cold: air leakage, insufficient insulation, and poor ventilation. Fix those, and you fix ice dams at the source.
How to Prevent Ice Dams: The Permanent Fixes
The only lasting way to prevent ice dams is to keep your attic cold and evenly temperatured so the snow on your roof melts only from the sun and air, not from heat escaping below. Here is how, in order of impact.
1. Seal Air Leaks Into the Attic
This is the most important and most overlooked step. Warm, moist air from your home leaks into the attic through dozens of small gaps. Common culprits include:
- Recessed "pot" lights and other ceiling light fixtures
- The attic hatch or pull-down stairs
- Gaps around plumbing stacks, the furnace flue, and chimneys
- Bathroom and kitchen exhaust fan housings
- Wiring penetrations and ceiling drywall seams
- Open soffits and dropped ceilings over cabinets
Sealing these leaks with the appropriate caulk, foam, or weatherstripping stops warm air from reaching the attic in the first place. It also lowers your heating bills.
2. Add Enough Attic Insulation
Once leaks are sealed, insulation slows the heat that still tries to escape, keeping your attic floor cold. Current Ontario Building Code generally calls for around R-60 in attics, and many older GTA homes fall well short of that. A full attic insulation top-up commonly runs in the range of about $1,500 to $3,500, which is typically far less than the cost of repairing the damage from even a single ice dam leak.
3. Balance Your Attic Ventilation
The goal of ventilation is to keep the attic as cold as the outdoor air by flushing out any heat that does get in. A balanced system has:
- Soffit vents along the eaves to draw cool outdoor air in, and
- Ridge or roof vents near the peak to let warm air out.
This continuous airflow keeps the whole roof surface at a more even, cold temperature. Make sure insulation is not blocking the soffit vents, baffles can keep that airflow path clear.
4. Keep Snow Off the Lower Roof
For a quick, ongoing measure, use a roof rake from the ground to pull snow off the bottom few feet of your roof after heavy GTA snowfalls. Less snow at the eaves means less material available to melt and refreeze into a dam. Never get up on a snowy or icy roof yourself, that is genuinely dangerous.
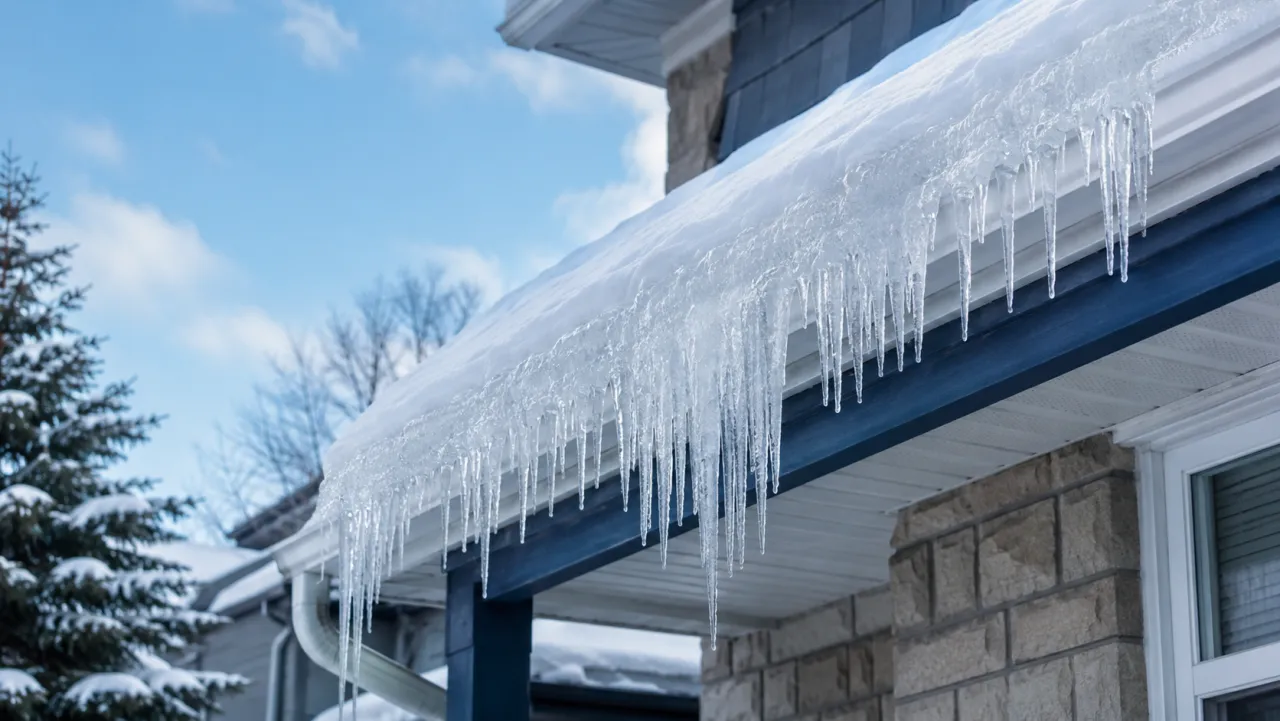
Warning Signs an Ice Dam Is Forming
Catch these early and you can act before water gets inside:
- Thick ridges of ice along the roof edge, gutters, or eaves.
- Large icicles hanging from the gutters, often a telltale sign that meltwater is refreezing at the edge.
- Uneven snow melt, where the upper roof is clear of snow but the eaves stay iced over.
- Water stains on upstairs ceilings or along the tops of exterior walls.
- Peeling paint, damp drywall, or a musty smell in upper rooms.
What to Do if an Ice Dam Has Already Formed
If you spot a dam or, worse, water coming in, act quickly but safely.
- Clear snow from the lower roof with a roof rake from the ground to remove the supply of meltwater feeding the dam.
- Do not chip, hammer, or chisel the ice. You will almost certainly damage your shingles, gutters, or yourself.
- Do not use open flame or boiling water on the dam.
- If water is leaking inside, move belongings out of the way, put down buckets and towels, and gently relieve pressure from a bulging, water-filled ceiling with a small drain hole and a bucket underneath if it is safe.
- Increase attic airflow temporarily if you can do so safely, and avoid adding heat to the attic.
- Call a professional for safe ice dam removal (often with low-pressure steam) and to address any water that has already gotten inside.
Once the immediate emergency is handled, document any interior damage with photos and contact your insurer. Then plan the attic air-sealing, insulation, and ventilation upgrades so it does not happen again next winter.
Ice Dam Leaking Into Your Home? Call Now.
If an ice dam has pushed water into your ceilings or walls, FirstLine Restoration can help. We have served the Greater Toronto Area since 2006, and we are licensed, insured, and WSIB compliant with a 5-star Google reputation and a 45-minute emergency response. We will dry out the damage and help you keep it from coming back.
Call (416) 900-3508 for 24/7 emergency ice dam damage restoration.
How FirstLine Restoration Helps
When an ice dam turns into an interior leak, the water damage is what costs you. Our crews handle complete ice dam damage restoration, broader water damage restoration for soaked ceilings, walls, and insulation, and basement flood restoration if water has tracked all the way down. We dry the structure to a verified standard, treat for mould risk, and coordinate directly with your insurance adjuster.
Frequently Asked Questions
What is the best way to prevent ice dams permanently?
Keep your attic cold and your warm air out of it. The permanent fix is a combination of air-sealing leaks from your living space into the attic, adding insulation up to current code (around R-60), and balancing attic ventilation with soffit and ridge vents. Roof raking helps as an ongoing measure but is not a substitute for the attic upgrades.
Should I knock the ice off my roof myself?
No. Chipping or hammering ice damages shingles and gutters and is dangerous to do from a ladder in winter. Use a roof rake from the ground to clear snow, and call a professional for safe ice dam removal, usually done with low-pressure steam.
Does insurance cover ice dam damage in Ontario?
Interior water damage from an ice dam is often covered under standard Ontario home insurance policies, since it is typically considered sudden and accidental, but coverage varies by policy. Document the damage with photos and contact your insurer or broker promptly to confirm and open a claim.
Water, fire, or mould emergency in the GTA?
45-minute emergency response. Documented, insurance-ready work. We answer 24/7/365.
Call (416) 900-3508